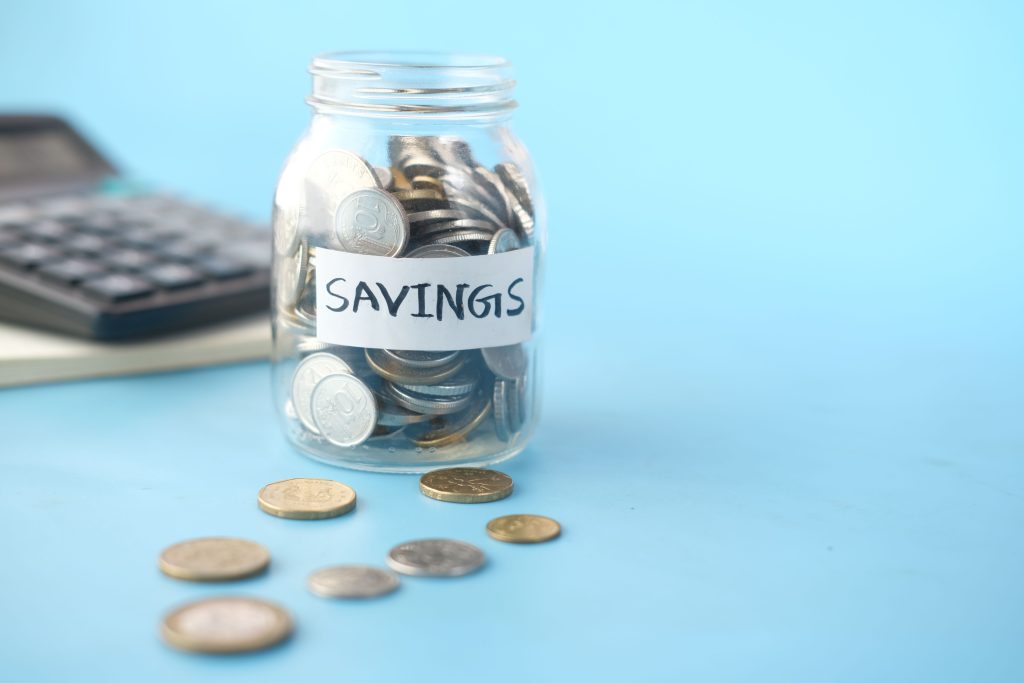
Author: davidcarter

  • How to Stop Impulse Buying: The 24-Hour Rule That Actually Works

    How to Stop Impulse Buying: The 24-Hour Rule That Actually Works

    woman shopping with bags at mall — how to stop impulse buying

    Photo by Vitaly Gariev on Pexels

    The average American spent $282 a month on impulse purchases in 2024 — that’s $3,381 a year on stuff they never planned to buy. If that number made you slightly nauseous, you’re in the right place.

    Impulse buying isn’t a personality flaw. Stores, apps, and websites are literally engineered to make you spend before your brain catches up. The good news? There’s one simple rule that can stop most of it — and it takes zero willpower.

    What Is Impulse Buying (And Why We All Do It)

    Impulse buying is any purchase you make without planning it beforehand. It’s the shoes you didn’t know you needed until they were 40% off. The random kitchen gadget that looked amazing on TikTok at 11pm. The third item in your Amazon cart that somehow snuck in.

    And it’s not just young people. 89% of Americans have made an impulse purchase at some point, and it cuts across every generation. The triggers are everywhere: flash sales, “only 3 left in stock!” warnings, one-click checkout, social media ads timed exactly when you’re bored or stressed.

    Here’s the psychological truth: when you see something you want, your brain’s reward system fires up and releases dopamine. That feels like excitement, which your brain interprets as “yes, this is a good idea.” Rational thinking gets crowded out. You buy first, regret later — and nearly 44% of impulse buyers report feeling regret after the purchase.

    The problem isn’t you. The problem is that you’re fighting a billion-dollar industry designed to outrun your better judgment. So instead of relying on willpower, let’s use a system.

    The 24-Hour Rule: How It Works

    The rule is simple: before buying anything that isn’t on your planned shopping list, wait 24 hours. Close the tab. Put the item down. Walk away. Then come back the next day and decide.

    That’s it. No complex budget spreadsheet, no harsh restrictions, no suffering. Just a pause.

    Why does it work? Because the urge to buy something is almost always temporary. The dopamine spike that made that item feel essential fades within hours. When you come back the next day, you often look at the item and think, “…yeah, I don’t actually need that.” The emotional charge is gone. Your rational brain is back in the driver’s seat.

    💡 How to apply it right now: When you feel the urge to buy something unplanned, add it to a “Want List” — a note on your phone or a simple bookmark folder. Give it 24 hours. If you still want it tomorrow and it fits your budget, you can buy it without guilt. Most of the time, you’ll find you’ve already forgotten about it.

    I’ll be honest — the first time I tried this, I was skeptical. I thought the 24-hour wait would just make me anxious about missing a deal. But what actually happened was the opposite. Most of the things I put on my Want List I never went back to buy. And the few I did buy, I was genuinely glad about. The rule doesn’t stop you from spending — it stops you from spending stupidly.

    When to Use 48 Hours (or Even a Week)

    The 24-hour rule is great for everyday purchases — a new top, a book, a random gadget. But for bigger purchases, extend the wait time proportionally.

    Purchase Size Suggested Wait Why
    Under $50 24 hours Enough time for impulse to fade
    $50–$200 48–72 hours Bigger sting if you regret it
    $200–$500 1 week Check your budget, compare options
    $500+ 30 days Major purchases deserve real research

    The bigger the number, the more time you need. A $600 impulse buy isn’t just annoying — it can actually set back your savings goals by weeks. Scale your patience with your price tag.

    woman pausing with coffee mug — taking time before impulse buying

    Photo by www.kaboompics.com on Pexels

    5 Things to Do During the Wait (So You Don’t Cave)

    The 24-hour rule only works if you actually wait. Here’s how to survive that window without sneaking back to the checkout page at midnight.

    1. Add it to a Want List, not your cart

    Putting something in your cart keeps it in your head (and the retailer knows this — carts are designed to feel like commitment). Instead, screenshot it or add it to a running list in your notes app. Out of the cart = out of your mind.

    2. Ask: what problem am I actually trying to solve?

    Impulse purchases often mask an emotional need — boredom, stress, the feeling that you deserve a reward. If you’re buying a fancy planner because you feel disorganized, a planner might not fix the disorganization. Identify the real problem first.

    3. Check if you already own something similar

    Before the 24 hours are up, go look at what you already have. Half the time, you’ll find you already own something that does basically the same job. A new pair of black pants is exciting — until you remember the three pairs already sitting in your closet.

    4. Calculate the real cost in hours worked

    Divide the price by your hourly wage (after taxes). A $90 impulse buy at $15/hour = 6 hours of your life. Suddenly that random kitchen gadget feels a lot less exciting when you realize it cost you most of a workday. This trick works almost every time.

    5. Unsubscribe from the store’s emails right now

    If you’re getting a “flash sale ends in 2 hours!” email, the whole 24-hour rule falls apart. Remove the temptation at the source. Unsubscribe from retail emails, mute the Instagram accounts that make you want to spend, and delete shopping apps you check out of habit. You can’t impulse-buy what you don’t see.

    What If the “Deal” Expires?

    This is the #1 objection to the 24-hour rule. “But the sale ends tonight!” Here’s the truth nobody tells you: most sales come back. Retailers run the same 30%-off promotion multiple times a year. “Limited time” is one of the oldest tricks in the book.

    🛒 Real talk: If a deal genuinely expires and you still want the item the next day, you can usually find a coupon, wait for the next sale, or find a comparable product elsewhere. The “now or never” feeling is almost always manufactured. Don’t let it make your financial decisions for you.

    If an item is truly gone tomorrow and you can’t get it for a similar price ever again — ask yourself honestly: is this something I needed before I saw this sale? If the answer is no, you don’t actually need it. The sale just made you think you did.

    Build the System: Beyond the 24-Hour Rule

    The 24-hour rule is a great start, but a few extra habits will make it bulletproof.

    Give yourself a small guilt-free spending budget. Budgeting for fun money sounds counterintuitive, but it works. When you have $30–$50 a month designated for “whatever I want,” you spend it intentionally instead of impulsively. If something costs more than your fun budget, it goes on the 24-hour list. This pairs really well with tools like the best budgeting apps for beginners — tracking your spending makes the numbers real in a way that “I think I’m being careful” doesn’t.

    Always shop with a list. Whether it’s groceries or a Target run, go in with a written list and a rough budget. List-less shopping is impulse shopping’s best friend. While you’re at it, our guide to saving money on groceries without coupons has some solid strategies that also apply to general shopping habits.

    Know your triggers. Most people impulse-buy in specific situations: late at night, when stressed, while bored on the couch, or after scrolling social media. Once you know your personal danger zones, you can set up guardrails. No shopping apps after 9pm. No browsing when you’re upset. No “just checking” Amazon during your lunch break.

    Do a monthly subscriptions audit. Impulse spending doesn’t just happen at checkout — it also happens when you sign up for a free trial and forget to cancel. A quick subscription review every month can save you $50–$100 without buying a single thing less. We put together a full subscription audit checklist if you want to start there.

    One Rule, A Lot of Saved Money

    The 24-hour rule won’t turn you into a robot who never buys anything fun. It just adds a little friction between the want and the wallet — and that friction is enough to stop most impulse purchases before they happen.

    Start small. Pick one category where you know you overspend — clothes, Amazon, food delivery, whatever it is — and apply the rule there for 30 days. Track what you almost bought but didn’t. By the end of the month, you’ll probably be surprised how much you saved without feeling like you deprived yourself of anything important.

    Turns out, most of what we “need” right this second, we didn’t need at all by tomorrow morning.

    Written by David Carter  |  savemoneysimple.com

  • Is Buying in Bulk Really Cheaper? When It Works and When It Doesn’t

    Is Buying in Bulk Really Cheaper? When It Works and When It Doesn’t

    warehouse store interior with bulk shelving for buying in bulk

    Photo by Antonius Natan on Pexels

    That giant tub of peanut butter seemed like such a great idea at the time. And honestly, maybe it was. But the 10-pound bag of spinach that turned into a science experiment by Wednesday? That one still hurts.

    Buying in bulk has a reputation as one of the smartest things a frugal person can do. And sometimes that’s absolutely true. But sometimes you’re not saving money — you’re just buying more stuff to eventually throw away. The math only works in your favor if you actually use what you buy. So let’s break it down honestly: when does buying in bulk actually save you money, and when does it quietly drain your wallet?

    The Real Math Behind Bulk Buying

    The logic is simple: buy more at once, pay less per unit. And it’s real — warehouse clubs like Costco and Sam’s Club typically sell non-perishables at 10–30% less per unit than regular grocery stores. On paper, that’s a solid deal.

    But here’s the catch most people miss: the per-unit price only matters if you use every unit. Research from ReFED shows the average American spent over $760 on food that went uneaten in 2024. A big chunk of that waste comes from buying more than we can realistically consume — and bulk packaging makes it incredibly easy to overbuy.

    Research from the University of Arizona found that bulk buyers throw out significantly more food than shoppers who buy groceries more frequently. The reason is surprisingly human: we’re great at noticing the sticker price on food, but terrible at mentally accounting for what we’ll throw away later. Buy a 5-pound bag of chicken at a great per-pound price, let two pounds go bad, and suddenly your “deal” just got a lot more expensive.

    💡 The Golden Rule of Bulk Buying: A low per-unit price is only a real saving if you use every unit. Otherwise, you’re not saving money — you’re paying more for a bigger trash bag.

    When Buying in Bulk Actually Makes Sense

    Bulk buying shines brightest in two specific situations: when you’re buying something that won’t expire anytime soon, and when you know for a fact you’ll use all of it. Here’s where the savings are genuinely real:

    Non-Perishable Pantry Staples

    Toilet paper, paper towels, laundry detergent, dish soap, canned beans, rice, pasta, oats — these are bulk buying’s sweet spot. They don’t expire quickly (or at all), you’ll definitely use them eventually, and the savings add up fast. Warehouse clubs keep non-perishables priced aggressively, and if you’re buying them consistently, you stand to save quite a bit.

    From what I can tell, paper products are one of the best bulk buys out there. Analysts predict bulk paper towels at Sam’s Club will run around $16–18 for a large pack versus $18–20 at Costco, and both are significantly cheaper than what you’d pay at a regular grocery store for the same number of sheets.

    Household Cleaners and Personal Care

    Shampoo, body wash, hand soap, cleaning sprays — if you’re loyal to a particular brand, buying a large supply at once is almost always cheaper. These products have long shelf lives, take up minimal space, and you’ll absolutely use them. This is one category where I genuinely don’t understand why people buy single bottles at the drugstore when a 3-pack costs a fraction more.

    Frozen Proteins (If You Have Space)

    Buying chicken breasts, ground beef, or salmon in bulk and portioning them into freezer bags is a legitimate money-saver — as long as you have freezer space. The key is immediately portioning and labeling everything when you get home, not dumping the whole package in the freezer and hoping for the best. (We’ve all hoped for the best. The best rarely shows up.)

    Products You Use at a Predictable Rate

    Coffee, vitamins, pet food — anything where you have a real sense of how fast you go through it is fair game. If you drink two cups of coffee a day, you know roughly how many pounds of beans you’ll need in a month. That predictability makes bulk buying safe and smart.

    When Buying in Bulk Backfires

    organized pantry jars with bulk dry goods and food storage

    Photo by RDNE Stock project on Pexels

    Now for the honest part. Bulk buying fails spectacularly in these situations:

    Fresh Produce (Unless You Have a Plan)

    A 5-pound bag of salad mix for $6 sounds amazing. But if two people realistically eat one bag of salad per week, you just bought five weeks of salad. It’ll be brown soup by next Wednesday. The only way bulk produce makes sense is if you meal prep aggressively, have a large family, or know you’re cooking for a crowd.

    Products You’re Trying for the First Time

    This is a trap I’ve fallen into. You see a giant jug of some new salsa or a flavored protein powder at Costco, it tastes fine in the sample, and you grab it. Then you get home, try a full serving, and realize you hate it. Now you own a gallon of something unpleasant. Always try a product in a regular size first before committing to a warehouse quantity.

    Items You’ll Lose Track Of

    Research consistently shows that many families are tempted into bulk purchases of food they’ll never fully consume just to get a good deal on per-unit cost. Out of sight really is out of mind. If your pantry is deep and disorganized, stuff gets lost and expired in the back corners. Before buying in bulk, ask yourself: will I actually see this and remember to use it?

    Small Households

    If you’re one or two people, bulk buying requires honest self-assessment. A 10-pound bag of potatoes might work great for a family of five. For a single person, you’ll throw away at least half. Scale matters. A lot.

    When the Membership Fee Eats Your Savings

    As of 2025, entry-tier warehouse club memberships cost $65 at Costco, $50 at Sam’s Club, and $60 at BJ’s. If you’re only shopping there a handful of times a year or buying just a few items, you may not save enough to cover that fee. Do the actual math before renewing.

    A Quick-Reference Guide: Buy in Bulk vs. Skip It

    ✅ Buy in Bulk ❌ Skip the Bulk
    Toilet paper & paper towels Fresh salad greens or herbs
    Rice, oats, dried pasta Bread (molds fast in bulk)
    Laundry & dish detergent Products you’ve never tried
    Frozen proteins (portioned) Dairy (unless large household)
    Coffee & tea Snacks you eat impulsively
    Vitamins & supplements Specialty spices you rarely use
    Canned goods (beans, tomatoes) Produce for a 1–2 person household

    How to Actually Make Bulk Buying Work for You

    The difference between people who save real money at Costco and people who just spend more there comes down to a few habits:

    Go with a list, not curiosity. Warehouse stores are designed to trigger impulse buys. Giant displays, free samples, and shiny new products are everywhere. If you wander in without a plan, you’ll walk out with things you didn’t need and won’t finish. Decide what you’re buying before you go, and stick to it.

    Compare the price per unit, not the total price. A $12 pack that comes out to $0.40 per unit beats a $4 pack at $0.60 per unit all day long. Most grocery stores now show unit pricing on shelf tags — actually look at it. And always compare against your regular grocery store price to make sure the bulk deal is actually a deal.

    Store things properly. Buying a big bag of flour is a waste of money if it gets weevils by month two. Invest in a few good airtight containers for dry goods, and you’ll get your money’s worth. Studies show the average grocery customer now belongs to 2.8 loyalty or membership programs — so if you’re not using your warehouse membership strategically, you’re just adding another card to your wallet without the benefit.

    Split bulk purchases with friends or family. Can’t personally use 50 trash bags before the end of the decade? Text a friend and split the pack. You both get the bulk price, and nobody drowns in excess toilet paper. This works especially well for non-perishable household goods.

    💡 Pro tip: Before you renew your warehouse club membership, add up what you actually saved on your purchases over the past year. Many clubs show your purchase history — use it. If your savings don’t exceed the membership fee, it might be time to reconsider.

    Is a Warehouse Club Membership Worth It?

    For many households, yes — but it depends on your shopping habits and family size. Studies show families spending $150 per week at regular supermarkets could see potential yearly savings of $2,000 or more by shopping at warehouse clubs strategically. But that assumes you’re buying the right things and not letting food go to waste.

    For smaller households or anyone who travels frequently, a membership might not pay off. If you only shop at Costco three times a year, you need to save at least $21.67 per trip just to break even on a $65 membership. That’s doable, but it requires actually showing up — and buying the right things when you do.

    One underrated perk worth mentioning: both Costco and Sam’s Club sell gas at roughly 20–40 cents below the local average, which can save you $200–$500 per year depending on how much you drive. For a lot of members, that alone justifies the fee — everything else they buy in bulk is just gravy.

    If you want to dig deeper into saving on groceries without stepping foot in a warehouse store, check out our guide on how to save money on groceries without coupons. And if you’re interested in comparing store brand versus name brand products across common categories, our breakdown of 20 products where the cheap store brand wins is worth a look before your next shopping trip.

    The Bottom Line

    Buying in bulk really is cheaper — but only for the right products, in the right quantities, for the right household. The secret isn’t shopping at Costco. It’s knowing exactly which items to buy there and which to skip entirely.

    Think of bulk buying as a tool, not a personality trait. The goal is never to own more stuff. The goal is to spend less money on the things you actually need. Use it that way, and the savings are real and consistent.

    And if you’re still on the fence — start small. Pick three items you know you’ll definitely use and buy those in bulk first. See how it goes. If you’re throwing stuff away, recalibrate. If you’re genuinely saving, expand. It’s not complicated. It just requires paying a little more attention than usual.

    Which, considering it can save you hundreds of dollars a year, seems like a pretty fair trade.

    Written by David Carter  |  savemoneysimple.com

  • How to Save Money on Rent (Without Moving)

    How to Save Money on Rent (Without Moving)

    bright modern apartment living room with big windows and natural light — how to save money on rent
    Photo by Max Vakhtbovych on Pexels

    Nearly half of all US renters spend more than 30% of their income on rent. That’s not a fun statistic — especially when your landlord hands you a renewal notice with a number that’s mysteriously higher than last year.

    The good news? You don’t have to pack boxes to pay less. There are real, practical ways to cut your rent costs while staying exactly where you are. Let’s get into them.

    Negotiate Your Rent (Yes, You Can)

    Most tenants assume rent is fixed. It’s printed on the lease, so it must be final, right? Not quite. Rent is negotiable more often than landlords want you to know.

    Think about it from your landlord’s side. When a tenant leaves, they lose weeks of rental income while the unit sits empty. Then they pay to list it, show it, screen applicants, and prep the apartment for the next person. Losing a reliable tenant is expensive. That gives you real leverage — you just have to use it.

    The best time to bring up rent is 60–90 days before your lease renewal. Come prepared: look up comparable apartments in your area on Zillow, Apartments.com, or Craigslist. If similar units nearby are going for $150 less per month, that’s your opening. Show your landlord the data. Say something like:

    💬 Try this: “I’d love to stay — I’m a good tenant and this place works for me. But I’ve been seeing comparable apartments in the area for [X]. Is there any flexibility on my renewal rate to match the market?”

    You might not get everything you ask for. But even a $100/month reduction saves you $1,200 a year — just from a five-minute conversation. I’m always amazed at how many people never even try.

    Sign a Longer Lease

    Landlords love stability. A tenant who commits to 18 months or two years instead of the standard one year is their dream renter. That predictability is worth something to them — and you can trade it for a lower monthly rate.

    When you’re at renewal, ask: “Would you be willing to offer a discounted rate if I sign for 18 months or two years?” Many landlords will say yes — sometimes $50–$150 off per month just to lock in a good tenant. Over two years, that adds up to real money.

    One important caveat: only do this if you’re genuinely planning to stay. Breaking a long lease can come with steep penalties that wipe out any savings. But if you’re settled in a neighborhood you love, this is one of the easiest rent reductions on this list.

    Offer to Pay a Few Months Upfront

    Cash in hand is a powerful thing. If you have savings, offering to prepay two or three months of rent upfront can be a compelling reason for your landlord to shave some off your monthly rate.

    A classic example: offer to pay 11 months upfront and ask for the 12th month free. Get the agreement in writing — ideally as a lease addendum, not just a verbal handshake. This works best with individual landlords who manage their own property, not large apartment corporations with rigid systems.

    Obviously, this only makes sense if it doesn’t drain your emergency fund. Never trade financial security for a rent discount.

    Give Up a Parking Space You Don’t Use

    This one is underrated. If your unit comes with a parking spot but you don’t have a car — or you barely use one — that parking space is free money you’re leaving on the table.

    Offer to give it up in exchange for a monthly rent reduction. Your landlord can rent the space separately to someone else, and you get a lower bill. In cities, parking spots can be worth $50–$200/month on their own. Even if your landlord only passes back half that value to you, it’s a painless win with zero effort on your part.

    Trade Services for Rent Reduction

    Got a useful skill? Some landlords — especially individual owners of small properties — are open to exchanging services for discounted rent. We’re talking things like:

    • Basic property maintenance — mowing, shoveling snow, seasonal yard work
    • Minor repairs and handyman work — if you’re handy with a drill and plumbing basics
    • Tenant coordination — if you’re in a multi-unit building, acting as an informal on-site contact
    • Cleaning common areas — lobbies, laundry rooms, hallways

    A $50/month rent reduction doesn’t sound huge, but that’s $600 a year for maybe 30 minutes of work per week. Worth at least asking. And as always — get any agreement in writing.

    couple negotiating with real estate agent to save money on rent
    Photo by Ivan S on Pexels

    Get a Roommate (Or Rent Out a Room)

    This is the most impactful thing on this list, and I know — it’s not for everyone. But hear me out.

    If you have an extra bedroom, even a small one, renting it out can cut your rent cost in half overnight. A roommate paying $700/month on a $1,400 apartment means you’re basically living for free once utilities split too. That’s not a small number — that could be the difference between paycheck-to-paycheck and actually building savings.

    Good platforms for finding a roommate include Roomies, SpareRoom, and Facebook Marketplace. Before going this route, make sure your lease allows it — some don’t. And take the screening process seriously. A bad roommate can be worse than paying full rent alone. (Ask me how I know.)

    Alternatively, if your area allows short-term rentals, listing a spare room on Airbnb during peak weekends can generate several hundred dollars a month. Again, always check your lease and local regulations first.

    Skip the Amenities You’re Not Using

    If you’re apartment hunting or facing a renewal, look hard at what your rent actually buys. Fancy complexes load units up with amenities — rooftop decks, coworking spaces, on-site gyms, concierge services — and they charge for every bit of it.

    Ask yourself honestly: when did you last use the building gym? If your gym membership is separate, or you work out outside, you’re paying for something you don’t need. Same goes for parking, storage units, and other add-ons that get bundled into rent without you realizing it.

    💡 Quick tip: When renewing, ask your landlord if any amenities can be removed from your package in exchange for a lower rate. Some will say yes — especially if they need to fill a unit.

    Cut the Costs That Tag Along With Rent

    Your “rent” number isn’t the only thing eating into your housing budget. Utilities, renter’s insurance, and internet can add $200–$400 more every month on top of what you’re already paying.

    A few places to look:

    • Your electric bill: Simple changes — LED bulbs, smart power strips, unplugging devices — can trim this by 10–20%. We have a full breakdown on how to cut your electric bill in half.
    • Your phone bill: If you’re still on a major carrier paying $70–$90/month, switching to a budget MVNO can save you $40–$60/month instantly. We’ve covered the best options in detail — check out our guide on how to cut your phone bill in half.
    • Internet: Call your provider and ask for their current retention deals. Threatening to cancel almost always unlocks a promotional rate for existing customers.
    • Renter’s insurance: Shop this annually. Rates vary wildly and comparison sites can find you solid coverage for $12–$15/month instead of $25+.

    None of these feel as dramatic as a rent reduction, but lowering your total housing costs by $150–$200/month through bills adds up to $1,800–$2,400 per year. That’s real money.

    Time Your Negotiation Right

    Timing matters a lot in the rental market. Landlords know that most people move in spring and summer — school’s out, weather is nice, everyone’s shuffling apartments. That’s when demand is highest, so landlords have the least reason to negotiate.

    Winter is your friend. If your lease is coming up for renewal between November and March, you have real leverage. Fewer people are moving, landlords are more worried about vacancies, and the market works in your favor. If your renewal hits in summer, try to start the conversation early — or ask to shift the lease end date to a winter month on your next renewal.

    Know Your Rights Before You Negotiate

    Before any negotiation, spend 15 minutes understanding the rental laws in your state and city. Some places have rent stabilization or rent control rules that actually limit how much a landlord can raise your rent each year. If you live in one of those areas, your landlord may not be able to raise your rent as much as they’re claiming — and knowing that changes the conversation entirely.

    Google “[your city] tenant rights” or “[your state] rent increase laws” to start. Information is free, and a well-informed tenant is a much harder one to push around.

    Quick Summary: What You Can Do This Week

    🏠 Low effort, big impact:

    • Research comparable apartments nearby — get your data ready
    • Set a reminder to contact your landlord 60–90 days before renewal
    • Ask about giving up parking if you don’t use it
    • Call your internet provider and ask for a better rate today
    • Check your state’s tenant rights to see if rent control applies

    The Bottom Line

    Rent is the biggest line item in most people’s budgets, and 22.7 million US households are currently considered “cost-burdened” by housing costs — meaning they spend more than 30% of their income on rent. That’s a Harvard study stat, not something I made up to scare you.

    The thing is, most people treat rent like it’s as permanent as gravity. It’s not. It’s a number on a piece of paper — one that can often be changed if you’re willing to have an awkward conversation, get a little creative, or simply ask at the right time.

    You don’t need to move to a cheaper city. You don’t need to downsize into a closet. You just need to stop assuming the number your landlord gave you is the only number possible.

    And if negotiating rent sounds terrifying? Think of it this way: the worst they can say is no, and you’re exactly where you started. The best they can say is yes — and suddenly you’re saving $100+ a month without doing a single thing differently.

    That conversation is worth having.

    Written by David Carter  |  savemoneysimple.com

  • 15 Ways to Lower Your Electric Bill This Summer

    15 Ways to Lower Your Electric Bill This Summer

    bright sunny living room with large windows to lower electric bill this summer

    Photo by Max Vakhtbovych on Pexels

    Last summer, my electric bill hit $214 in August and I genuinely considered just living in the dark. Air conditioning running 24/7, a fridge that never closes all the way, fans in every room — and somehow the bill kept climbing. Sound familiar? The average American summer electric bill is now around $178 per month from June through September, according to the U.S. Energy Information Administration — and that number has been rising every year.

    The good news: you don’t need to roast in 90-degree heat to save money. These 15 changes are practical, specific, and most of them cost you nothing upfront. Start with even two or three and you’ll feel the difference on next month’s bill.

    The Big One: Your Air Conditioner

    1. Set Your Thermostat to 78°F (Not 72°F)

    Every degree you raise the thermostat saves you roughly 3–5% on your cooling costs. That means moving from 72°F to 78°F could cut your AC bill by nearly 20% — and honestly, 78°F is perfectly fine with a ceiling fan running. You adjust faster than you think.

    2. Use “Set It and Forget It” Schedules

    If your thermostat has a programmable schedule (most do, even cheap ones), use it. Set it to 82°F or higher when you’re away during the day and bring it back down 30 minutes before you get home. No reason to cool an empty house. A programmable thermostat used properly saves the average household around $50–$100 per year on cooling alone.

    3. Clean Your AC Filter Every Month

    A clogged air filter forces your AC unit to work harder, which means it burns more electricity for the same amount of cooling. Dirty filters can increase energy consumption by 5–15%. Grab a $10 multi-pack of replacement filters, stick them in a drawer near the unit, and swap one in on the first of every month. Done.

    4. Run Ceiling Fans Counterclockwise in Summer

    Most people know ceiling fans help, but fewer know the direction matters. In summer, fans should spin counterclockwise (when looking up) to push cool air down. Check the little switch on the motor housing — flipping it takes 30 seconds and makes the room feel 4–5°F cooler, which means you can raise the thermostat without noticing.

    💡 Quick combo: Set your thermostat to 78°F + run the ceiling fan = feels like 73°F. You save on electricity and still feel comfortable. This one move alone can drop your bill by $20–$40 a month.

    Stop the Heat Before It Gets In

    5. Close Blinds on South- and West-Facing Windows

    South and west windows take the worst of the afternoon sun. Closing blinds or curtains on those windows during peak hours (roughly 10 AM–4 PM) blocks a surprising amount of radiant heat before it ever enters your home. This is completely free. If you want to go one step further, thermal blackout curtains can block up to 99% of sunlight and keep a room 10°F cooler — a good pair runs about $25–$40 on Amazon.

    6. Seal Air Leaks Around Windows and Doors

    Air leaks let your expensive cool air sneak outside and pull hot air in. Hold a stick of incense near your windows and door frames — if the smoke wavers, you’ve got a leak. A roll of weatherstripping tape costs about $8–$12 and takes 20 minutes to install. The Department of Energy estimates that sealing leaks can cut heating and cooling costs by 10–20%.

    7. Open Windows at Night (When It’s Actually Cooler)

    In many parts of the country, nighttime temperatures drop to the low 70s or even 60s in summer. If that’s your situation, turn the AC off after 10 PM, open windows on opposite sides of the house to create cross-ventilation, and let the night air do the work for free. Close everything up again before 8 AM and your house will stay cool longer into the day.

    hand adjusting modern home thermostat to lower electric bill this summer

    Photo by HUUM on Pexels

    Kitchen and Appliance Savings

    8. Cook Outside (or Use the Microwave)

    Your oven pumps out a massive amount of heat into your kitchen. In summer, that heat makes your AC work overtime to compensate. Grilling outside is obviously great, but even switching to the microwave, Instant Pot, or air fryer generates a fraction of the heat. A microwave uses about 70% less energy than a conventional oven and adds almost no heat to your home. Your electric bill — and your kitchen — will thank you.

    9. Run the Dishwasher and Dryer at Night

    Large appliances generate heat when they run. If you run the dishwasher or clothes dryer in the afternoon, you’re dumping heat into your home right when the AC is already fighting the outdoor temperature. Run them after 9 PM instead. Bonus: many utility companies charge lower “off-peak” electricity rates at night, so you might save on the energy cost itself too. Check your utility’s website — time-of-use rates are more common than people realize.

    10. Switch to Cold Water for Laundry

    About 90% of the energy your washing machine uses goes toward heating the water. Switching to cold water for most loads saves roughly $60–$70 per year and, for everyday clothes and linens, cleans just as well. Modern cold-water detergents are specifically designed for this. It’s a free switch that takes two seconds.

    Lighting and Phantom Loads

    11. Replace Incandescent Bulbs with LEDs — Today

    LED bulbs use about 75% less electricity than old incandescent bulbs and produce far less heat. The average home has 30+ light fixtures. Replacing them with LEDs saves roughly $150 per year on electricity — and that’s before accounting for the reduced heat load on your AC. A 4-pack of good LED bulbs runs about $8–$12 at any hardware store. This is probably the best dollar-per-dollar investment on this entire list.

    12. Unplug the Stuff You’re Not Using (Seriously)

    Televisions, gaming consoles, phone chargers, microwaves with clocks — all of these draw power even when switched off. This is called “phantom load” or “standby power,” and it accounts for about 10% of a typical home’s electricity use. The easiest fix: plug entertainment gear into a power strip and flip it off when you leave the room. Takes zero effort once it becomes a habit.

    smart electricity meter showing energy usage to lower summer electric bill

    Photo by Robert So on Pexels

    Water Heating and the Fridge

    13. Turn Down Your Water Heater to 120°F

    Most water heaters ship from the factory set to 140°F, which is hotter than you need and wastes energy constantly keeping water that hot. Dropping it to 120°F saves the average household $36–$61 per year with zero lifestyle change — your showers will still feel the same. Find the dial on the side of the tank and turn it down. Takes one minute.

    14. Keep Your Fridge Full (But Not Stuffed)

    A full fridge maintains temperature more efficiently than an empty one because the food itself acts as thermal mass. If you’re not stocking up on groceries regularly, fill empty space with bottles of water. On the flip side, stuffing it too full blocks air circulation and forces the compressor to run harder. Aim for about 70–80% full — it’s the sweet spot for efficiency.

    One More That Most People Skip

    15. Call Your Utility Company and Ask About Programs

    Most people don’t know their utility company offers money. Free energy audits. Rebates on LED bulbs, smart thermostats, and efficient appliances. Budget billing plans that smooth out the summer spike. Low-income assistance programs. Pre-paid plans with lower rates. I called my utility last year mostly out of curiosity and walked away with a $50 rebate on a smart thermostat I was already planning to buy. It took 12 minutes on the phone. Most utility websites have a “programs and rebates” or “savings” section — it’s worth 10 minutes of your time.

    📋 Want the full picture on cutting your utility costs? Check out our deep-dive on how to cut your electric bill in half — it covers long-term strategies beyond summer that can save hundreds per year.

    How Much Can You Actually Save?

    Here’s a quick snapshot of the biggest savings from this list:

    Action Estimated Monthly Savings Cost
    Raise thermostat to 78°F $20–$40 Free
    Seal air leaks $10–$30 $8–$12
    Switch to LED bulbs $10–$15 $8–$12/pack
    Cold-water laundry $5–$6 Free
    Use programmable schedule $8–$15 Free (if you have one)
    Unplug phantom loads $10–$15 Free (or $8 power strip)
    Turn down water heater $3–$5 Free

    Do all of the free ones, plus buy the weatherstripping and LEDs, and you’re realistically looking at $60–$120 less per month on your summer electric bill. That’s $240–$480 back in your pocket over a four-month summer.

    💡 Don’t stop at electricity: If your whole utility bill feels out of control, we’ve got practical scripts for negotiating your monthly bills down — including internet, cable, and even your utility provider in some states.

    The Bottom Line

    You don’t need a solar panel or a Tesla Powerwall to bring your summer electric bill down. Most of the biggest savings come from small habit shifts that cost nothing at all — adjusting the thermostat, closing blinds, flipping a switch on your ceiling fan. Start with three of these this week and check your next bill. I’d bet money you’ll see a difference.

    And if your bill still looks criminal after all of this — maybe it’s time to have a little chat with your utility company about what programs they’re hiding from you. They always have something.

    Written by David Carter  |  savemoneysimple.com

  • Snowball vs Avalanche: Which Debt Payoff Method Is Right for You?

    Snowball vs Avalanche: Which Debt Payoff Method Is Right for You?

    person planning debt payoff strategy snowball vs avalanche method
    Photo by Ann H on Pexels

    You have multiple debts, a little extra money each month, and no idea where to throw it first. The credit card at 24% APR is staring you down. So is that $800 medical bill you’ve been ignoring since last spring. And somewhere buried in a drawer is a student loan statement you’d rather not think about.

    Good news: there are exactly two proven strategies for tackling this mess — the debt snowball and the debt avalanche. Both work. Both will get you out of debt. But they feel completely different along the way, and picking the wrong one for your personality can quietly derail your whole plan.

    Let’s break them down clearly — with real numbers — so you can make an actual decision today.

    First, the Ugly Truth About Debt in America

    Before we get into strategies, let’s acknowledge that carrying multiple debts is not some rare personal failure. The average American carries over $104,000 in total debt — that’s credit cards, student loans, car payments, personal loans, and more, all stacked up at the same time.

    Credit card delinquency rates have been climbing too. More people are falling behind, not because they’re irresponsible, but because the math gets genuinely overwhelming when interest compounds faster than you can throw money at it.

    That’s exactly why having a system matters. Paying debts randomly — whoever called you most recently, or whichever balance triggered the most guilt this month — is the slowest and most expensive way to get free. Let’s do better.

    The Debt Snowball Method: Start Small, Build Momentum

    The snowball method was popularized by personal finance personality Dave Ramsey, and the basic idea is delightfully simple: pay off your smallest debt first, regardless of interest rate.

    Here’s how it works step by step:

    1. List all your debts from smallest balance to largest.
    2. Make the minimum payment on every debt every month.
    3. Throw every extra dollar at the smallest debt until it’s gone.
    4. Once it’s paid off, roll that payment into the next smallest debt.
    5. Repeat until all debts are dead.

    The name comes from the image of a snowball rolling downhill — small at first, picking up size and speed as it goes. Each debt you eliminate frees up more cash to attack the next one. By the time you hit your largest debt, you’re throwing a massive payment at it every month.

    💡 Real Example: Say you have a $400 medical bill, a $2,000 credit card, and a $9,000 car loan. With the snowball method, you laser-focus on that $400 medical bill first. Pay it off in two months. Now roll that payment into the credit card. Then the car loan. Each victory feels real. Each victory pays for the next one.

    Why the Snowball Works (Even When It Shouldn’t)

    On a spreadsheet, the snowball method is “wrong.” It ignores interest rates completely, which means you might be paying a 6% car loan aggressively while a 22% credit card quietly eats your money in the background.

    But here’s the thing: most people don’t abandon their debt payoff plan because of math. They abandon it because they feel like they’re getting nowhere. Three months of extra payments and the balances barely moved? That’s demoralizing. That’s when people give up and buy a PlayStation instead.

    The snowball solves the motivation problem. Clearing even a small debt feels like an actual win. Your brain gets a hit of dopamine. You feel like the system is working. And you’re more likely to stick with it long enough to actually finish.

    Best for: People who need early wins to stay motivated. Those who are overwhelmed by debt and need a clear, fast sense of progress. First-timers who’ve never successfully paid off debt before.

    The Debt Avalanche Method: Ruthless Efficiency

    The avalanche method is the mathematically optimal strategy. Instead of targeting the smallest balance, you target the debt with the highest interest rate first.

    The steps look almost identical to the snowball:

    1. List all your debts from highest interest rate to lowest.
    2. Make the minimum payment on every debt every month.
    3. Throw every extra dollar at the highest-rate debt until it’s gone.
    4. Roll that payment into the next highest-rate debt.
    5. Repeat until debt-free.

    The logic is straightforward: the highest interest rate is costing you the most money every single month. Eliminate it first, and you stop the bleeding at its worst point.

    woman using calculator to compare debt payoff snowball vs avalanche methods
    Photo by www.kaboompics.com on Pexels

    How Much Does the Avalanche Actually Save?

    Here’s a concrete comparison from CNBC Select using a sample debt scenario. A person with multiple debts paying $650/month extra toward debt:

    Method Total Interest Paid Time to Debt-Free
    Debt Snowball More 41 months
    Debt Avalanche ~$153 less 40 months

    Honest reaction? I expected a bigger gap. $153 and one month — that’s real money, but it’s not the dramatic difference some people imagine. The avalanche’s advantage grows significantly when interest rates are far apart and balances are large. In more extreme debt scenarios (think $50,000+ at varied rates), the savings can climb into the thousands.

    Best for: Patient, analytical people who can stay focused on a goal even without quick visible wins. People with high-interest credit card debt significantly larger than their other debts. Those who’ve proven to themselves they can stick to a plan.

    Snowball vs. Avalanche: Side-by-Side

    Feature Snowball ❄️ Avalanche 🏔️
    Order of attack Smallest balance first Highest interest rate first
    Interest savings Lower Higher
    Motivation boost Very high (quick wins) Lower (slow early progress)
    Best personality type Needs emotional wins Patient, data-driven
    Complexity Very simple Slightly more tracking needed

    So Which One Should You Actually Pick?

    Here’s the honest truth nobody tells you: the “best” method is the one you’ll actually stick with. A perfect avalanche strategy abandoned after four months will always lose to a snowball method followed through to the end.

    Ask yourself these two questions:

    Do I give up easily when I don’t see fast results? If yes — snowball, all the way. Don’t fight your psychology. Use it.

    Do I have one or two high-interest debts that are dramatically more expensive than the rest? If yes — avalanche makes more sense. Killing a 27% APR credit card before a 6% student loan is financially significant.

    🔀 Pro Tip — The Hybrid Approach: Start with the snowball to clear one or two small debts fast. Get the motivational boost. Then switch to the avalanche for the rest. You get the psychological wins AND the mathematical efficiency. It’s not cheating — it’s just being smart about how human brains work.

    When Your Interest Rates Are All Similar

    If your debts are all clustered in a similar interest rate range — say everything’s between 7% and 12% — it barely matters which method you use. The difference in interest paid will be minimal. In that case, go snowball. The motivation is more valuable than the negligible math difference.

    When Your Highest-Rate Debt Is Also Your Biggest

    This is the tough spot. Your most expensive debt is also the biggest mountain to climb. If the avalanche would have you staring at that giant balance for 18 months before it moves, that’s genuinely hard to sustain. Be honest with yourself. There’s no shame in choosing snowball here — just acknowledge you’ll pay a bit more in interest in exchange for staying in the game.

    One Thing Both Methods Require

    Neither strategy works without one crucial ingredient: extra money to put toward debt every month. If you’re currently just making minimums, both methods are on pause until you free up cash.

    That means before you commit to snowball or avalanche, you need a budget that creates actual breathing room. Cut subscriptions. Renegotiate bills. Take on a small side gig. Even $50 or $100 extra per month accelerates your payoff dramatically compared to minimum payments alone.

    Also worth doing before you start: make sure none of your debts have prepayment penalties. These are rare, but they exist on some personal loans and auto financing. A quick call to your lender takes two minutes and saves you from a nasty surprise.

    And don’t neglect a small emergency fund while you’re paying down debt. Saving $500–$1,000 first prevents you from needing to swipe a credit card the moment your car breaks down — which would undo months of progress in one afternoon. Want to know more about building that cushion? Check out our complete guide to saving money for practical strategies that actually fit a tight budget.

    If you’re also looking at where to cut monthly expenses to free up extra cash, our breakdown of subscriptions you’re probably wasting money on is a great starting point — it’s one of the fastest places most people find hidden cash.

    The Bottom Line

    Snowball or avalanche — both are infinitely better than the “just pay random amounts and hope” approach most people default to. The snowball gives you momentum and early wins. The avalanche saves you more money. The hybrid gives you both.

    Pick one. Write down your debts. Start this month. The exact method matters less than the decision to actually start — because the biggest debt-payoff mistake isn’t choosing the wrong strategy. It’s choosing none at all and letting another year of interest compound quietly in the background.

    Future you will either thank you or be very annoyed. Make it easy for them.

    Written by David Carter  |  savemoneysimple.com

  • How to Negotiate Your Internet Bill (Script Included)

    How to Negotiate Your Internet Bill (Script Included)

    woman talking on phone to negotiate internet bill

    Photo by kaboompics.com on Pexels

    Your internet provider is quietly charging you more than they need to — and they’re counting on you never calling about it. The average American now pays around $75 a month for home internet. That’s $900 a year for a service most people never once try to negotiate. One 20-minute phone call can change that.

    Why Negotiating Your Internet Bill Actually Works

    Internet service providers — Xfinity, Spectrum, AT&T, Verizon, you name it — have a dirty little secret: it costs them way more money to acquire a new customer than to keep an existing one. Which means the moment you sound like you might leave, suddenly they have all kinds of deals they didn’t mention before.

    New customers get the sweet promotional rates. Loyal customers get the full price. That’s backwards, and it’s why calling to negotiate is one of the highest-ROI things you can do with 20 minutes. Readers report saving anywhere from $5 to $45 per month — just from a single call to the retention department.

    The key word there is “retention.” That’s the department you want to reach. Regular customer service reps often can’t move the price much. Retention specialists? They have actual authority to offer discounts, credits, and promotions — because their entire job is to keep you from canceling.

    Step 1: Do This Before You Call (5 Minutes)

    Walking into this call unprepared is the number one mistake people make. Do five minutes of homework first and you’ll sound like someone who means business.

    Check your current bill: Know your exact monthly rate, what plan you’re on, and how long you’ve been a customer. “I’ve been paying $89 a month for three years” hits differently than “I’m not sure, something high.”

    Look up competitor prices: Go to the websites of 2–3 providers in your area and note what they’re charging new customers for similar speeds. Even if you’d never actually switch, having real numbers ready gives you negotiating power.

    Check your current provider’s new-customer deals: Go to their website like you’re a brand new customer signing up. Screenshot what they’re offering. If they’re offering $50/month to strangers and charging you $85, that’s your opening argument right there.

    Note any service issues: Had outages? Slow speeds? Connection dropping at odd hours? Document it. Technical problems are legitimate grounds for a credit or discount.

    Step 2: Make the Call the Right Way

    Call the main customer service number, but do NOT say you’re calling to ask about your bill. That lands you with a billing agent. Instead, say you’re thinking about canceling your service. That routes you — or gets you transferred — to the retention department, where the real deals happen.

    A few tactical tips before you dial:

    • Call on a weekday morning — reps are less rushed, hold times are shorter, and you’re more likely to get someone who’s patient and motivated.
    • Be friendly, not aggressive. This is a negotiation, not a fight. A warm tone gets you further than an angry one — the rep is a person too, and they have discretion in what they offer.
    • Don’t accept the first offer. The first offer is almost never the best offer. Thank them, then ask if there’s anything else they can do.
    • If the first rep says no, call back. Different agents have different authority levels — and different personalities. Try again on a different day.

    happy woman on laptop checking internet bill savings

    Photo by SHVETS production on Pexels

    The Word-for-Word Script

    Here’s a script you can use almost verbatim. Adjust the numbers based on your actual situation, but keep the structure.

    Opening — get to the right department:

    “Hi, I’ve been a [Provider] customer for [X years] and I’m honestly thinking about canceling. My bill keeps going up and I’ve been looking at other options. Can you transfer me to someone who handles cancellations or retention?”

    Once connected to retention — make your case:

    “I’m currently paying $[X] a month for internet. I just checked and [Competitor] is offering [similar speed] for $[Y] a month for new customers — and I also noticed that your own website is showing a promotional rate of $[Z] for new sign-ups. I’ve been a loyal customer for [X years] and have never missed a payment. I’d really like to stay, but I need the rate to make more sense. What can you do for me?”

    If they make an offer:

    “I appreciate that. Is that the best you can do, or is there any additional credit or promotion you could add on top?”

    If they say they can’t do anything:

    “I understand. Could I speak with a supervisor or someone with more authority? I really don’t want to cancel, but I need to see some movement on the price.”

    Before you hang up:

    “Could you send me a confirmation email with the new rate, how long it lasts, and the name of the promotion? I just want to make sure I have a record of what we agreed to.”

    That last part — asking for written confirmation — is crucial. Verbal promises in a customer service call are worth approximately nothing. Get it in writing, then check your next bill carefully to make sure the change actually went through.

    Two More Ways to Lower the Bill (Beyond Negotiating)

    Stop Renting Their Equipment

    Most internet providers charge a monthly equipment rental fee — usually $10–$15 per month — for a modem and router they gave you. That’s $120–$180 a year for hardware you don’t own. Buying a compatible modem-router combo typically costs around $100–$150 upfront, and it pays for itself within a year. After that, it’s pure savings. Just make sure it’s compatible with your provider before you buy — most have a list on their website.

    Right-Size Your Speed Plan

    Be honest: do you actually need gigabit internet? For most households, 100–200 Mbps is plenty — it comfortably handles multiple people streaming, video calls, and everyday browsing simultaneously. Many people pay for 500 Mbps or more because the salesperson upsold them at sign-up. Run a speed test (fast.com or speedtest.net), check what speeds you’re actually getting, and ask yourself if you’d even notice the difference on a cheaper plan. Downgrading one tier can save $10–$20 per month instantly, with zero negotiation required.

    💡 Quick Recap — Your Action Plan:

    1. Look up competitor prices + your provider’s new-customer rates
    2. Call and ask to be transferred to the retention/cancellations department
    3. Use the script — be friendly, be specific, don’t accept the first offer
    4. Ask for written confirmation of any changes
    5. Check if buying your own equipment makes sense
    6. Set a reminder to renegotiate in 12 months

    What to Do If They Won’t Budge

    Sometimes the answer is genuinely no — especially if you’re in an area with limited competition and your provider knows you don’t have great alternatives. It happens, and it’s frustrating.

    In that case: call back in a few weeks with a different agent. Seriously. Retention outcomes vary a lot depending on who picks up the phone and what promotions are active that week. What gets you a hard no today might get you a $25/month discount next month.

    Also, set a reminder to check for new providers in your area every six months. Fixed wireless internet from T-Mobile Home Internet and local fiber providers have been expanding fast in 2025–2026, and new competition often forces incumbents to get more flexible on pricing.

    And if you want to extend this approach to your other monthly bills, check out our guide on how to lower your monthly bills with proven call scripts — the same strategy works for phone, cable, and insurance. Or if you’ve already tackled your internet and want to keep the momentum going, see how to cut your electric bill in half with a few simple habit changes.

    Final Thought

    I’ll be honest — the first time I called to negotiate my internet bill, I felt a little awkward about it. Like I was complaining or being difficult. But here’s the thing: the company has been quietly charging you a higher rate than what they offer to strangers. You’re not being difficult. You’re just finally paying attention.

    Twenty minutes on the phone to save $20–$40 a month is $240–$480 a year. There aren’t many things you can do with twenty minutes that pay that well. Make the call.

    Written by David Carter  |  savemoneysimple.com

  • How to Budget With Irregular Income (And Stay Sane)

    How to Budget With Irregular Income (And Stay Sane)

    woman working from a bright sunny home office with irregular freelance income

    Photo by Los Muertos Crew on Pexels

    One month you made $6,000 and felt like a financial genius. The next month you made $1,800 and stress-ate an entire bag of chips in front of your budget spreadsheet. If that sounds familiar, you’re not bad with money — you just have an income that doesn’t play by the normal rules.

    The standard budgeting advice — “spend less than you earn, save 20%” — was written for people with steady paychecks. If you’re a freelancer, gig worker, seasonal employee, or commission-based earner, you need a different playbook. Here’s a realistic one.

    Why Normal Budgeting Advice Fails You

    Most budgeting systems assume one thing: you know how much money is coming in next month. When that assumption breaks, the whole system falls apart.

    This is the classic feast-or-famine cycle. Big month? You spend freely, maybe upgrade your subscriptions, eat out more. Slow month? Suddenly you’re doing the math on whether $12 guacamole is truly a necessity.

    The problem isn’t your spending habits — it’s your system. Or rather, the lack of one built for your reality. More than 73 million Americans are currently working as freelancers or independent contractors, and the vast majority are still trying to use budgeting tools designed for someone with a boring, predictable paycheck.

    The fix is simpler than you think. You don’t need to predict the future — you just need a system that handles the uncertainty for you.

    Step 1: Find Your Baseline (Your Lowest Comfortable Month)

    Before you can build a budget, you need one number to anchor everything: your monthly baseline.

    Pull up your income for the last 6–12 months. Find your average monthly income. Then find your lowest month. Your baseline lives somewhere between those two numbers — lean toward the lower end if your income swings wildly.

    💡 Example: If your last 12 months averaged $4,500/month but your worst month was $2,800 — budget as if you’re making $3,200/month. Anything above that is a bonus you can deploy strategically.

    This baseline becomes your “salary” — the number your entire life runs on. Not the $7,000 month. Not the fantasy version of your income. The real, sustainable floor.

    Yes, this feels uncomfortable at first. You’re leaving money on the table some months. But here’s the thing: that leftover money isn’t wasted — it’s going straight into the next step.

    Step 2: Build an Income Buffer Account

    This is the single most important thing you can do with irregular income. Open a separate savings account — your income buffer — and treat it like a holding tank.

    Every time you get paid (whether it’s $500 or $5,000), the money goes into this buffer first. Then, once a month, you transfer only your baseline amount into your main spending account. You become your own payroll department.

    📊 How it works in practice:
    March: You earn $8,000. Transfer your $3,200 baseline to checking. Buffer grows by $4,800.
    April: You earn $1,500. Transfer $3,200 from the buffer anyway. Life stays normal.

    The buffer absorbs the peaks and fills the valleys. Instead of feeling rich one month and panicked the next, your day-to-day spending stays completely consistent. This turns irregular income into predictable cash flow — it’s the closest thing to a paycheck you can give yourself as a self-employed person.

    Aim to build this buffer up to 2–3 months of your baseline before you start relaxing. That cushion is what keeps a slow quarter from becoming a crisis. Speaking of which, if you haven’t tackled an emergency fund yet, our guide on how to build an emergency fund on a low income walks through exactly how to start — even when money feels tight.

    colorful planner and pen for budgeting with irregular income

    Photo by Viridiana Rivera on Pexels

    Step 3: Build a Fixed-Costs-First Budget

    Now that you’ve got a stable “salary” flowing into your checking account, you budget like a normal person — almost.

    Start with non-negotiables: rent, utilities, insurance, groceries, minimum debt payments. These go first, every single month, no exceptions. Add them up — that’s your survival number.

    Everything else is flexible. And I mean everything. Dining out, entertainment, clothing, hobbies — these are dials you turn up in fat months and down in lean ones. The fixed costs don’t move. The flexible ones do.

    🧾 Quick framework:
    Fixed (non-negotiable): rent, utilities, groceries, insurance, loan minimums
    Semi-fixed: subscriptions, phone — review quarterly, cut aggressively during slow seasons
    Flexible: dining, entertainment, shopping — these absorb the hits

    One thing I’ve noticed talking to freelancers is that subscriptions quietly become fixed costs in people’s heads — even when they’re absolutely cuttable. If a slow month hits, that $14.99 streaming service is gone before rent is even considered. Treat your semi-fixed expenses as a separate review item every few months. For a structured way to do that, check out our post on subscriptions you’re probably wasting money on — it’s a solid audit checklist.

    Step 4: Taxes Are Not Optional — Set Them Aside First

    This is the part that bites people when they’re new to self-employment. Nobody withholds taxes for you. So when the IRS eventually asks — and they will ask — you need to have the money ready.

    The general rule of thumb: set aside 25–30% of every payment you receive for taxes. This covers federal income tax plus self-employment tax, which includes Social Security and Medicare. If you live in a state with income tax, you may need to set aside even more.

    The cleanest approach is to treat this as automatic. The moment money hits your buffer account, mentally (or literally) split it: 25–30% goes to a dedicated tax account. Do not touch it. Name the account something scary if it helps — “DO NOT SPEND THIS” has been known to work.

    If you’re self-employed, you’ll also owe quarterly estimated taxes to the IRS — typically in April, June, September, and January. Miss these and you get hit with penalties. Use IRS Form 1040-ES to estimate what you owe, or use a tax app that calculates it for you.

    Step 5: Have a Plan for the Good Months

    When the money finally rolls in — the big project, the great commission month, the unexpected invoice payment — there’s a real temptation to let your lifestyle quietly inflate. New laptop, nicer groceries, spontaneous weekend trip. No judgment (I’ve done it too), but the good months are actually your most important financial moments.

    Before you spend anything beyond your baseline, have a priority list ready. A simple one that works:

    1. Top up your buffer — make sure you have at least 2 months of baseline covered.
    2. Fund your emergency savings — aim for 3–6 months of essential expenses in a separate account.
    3. Pay off high-interest debt — anything above 10% interest is a guaranteed return when you pay it down.
    4. Invest — a SEP IRA or Solo 401(k) if you’re self-employed; both allow much larger contributions than regular IRAs.
    5. Enjoy the rest — guilt-free, because you handled your priorities first.

    Having this list written down before the money arrives is key. It’s very hard to make good financial decisions when you’re staring at $9,000 in your checking account for the first time in months. Decision fatigue is real. Make the decision in advance.

    Step 6: Track Your Income Patterns

    Most irregular earners have more patterns than they think. A freelance designer might always be busiest in Q4 when clients burn their budgets. A landscaper is slow in January. A wedding photographer knows February will be dead.

    Spend 15 minutes reviewing your last 12 months of income and actually look for the pattern. Write down which months tend to be strong and which are lean. Then plan accordingly: stock the buffer higher before slow season, cut discretionary spending in advance, and don’t take on new fixed expenses right before a historically dry period.

    A simple spreadsheet is totally fine for this. But if you want an app that does the tracking for you automatically, our guide to the best budgeting apps for beginners who hate budgeting covers options that actually work — including a few built specifically for variable income.

    Step 7: Give Yourself Permission to Be Imperfect

    Here’s something nobody tells you: even people with perfectly steady paychecks sometimes blow their budget. You’re managing a moving target with no employer safety net — you’re already doing harder work.

    Some months the system will wobble. You’ll dip into the buffer more than expected, or forget to log a payment, or spend on something you regret. That’s fine. The goal isn’t perfection — it’s having a system that catches you when things go sideways.

    Do a quick 15-minute money check-in every week. Not a full audit — just a glance. Where does the buffer stand? Did I move this month’s “salary” over? Any unexpected expenses coming up? Those five questions take less time than a single Netflix episode and will save you a lot of stress.

    📋 The Irregular Income Budget System — Quick Recap

    1. Find your baseline (average-to-low monthly income)
    2. Open a buffer account — all income lands here first
    3. Transfer only your baseline to checking each month
    4. Set aside 25–30% of every payment for taxes immediately
    5. Budget your baseline across fixed costs + flexible spending
    6. Have a surplus plan ready before the good months arrive
    7. Review income patterns; anticipate slow seasons

    Final Thought

    Irregular income doesn’t mean you can’t budget — it means you need a system that’s built for reality instead of a spreadsheet designed for someone who clocks in every Monday. The buffer account alone will change how your financial life feels. Not because you suddenly have more money, but because the uncertainty stops controlling you.

    You went self-employed for freedom. It’d be a shame to spend that freedom anxiously checking your bank account every time a slow week rolls around.

    Written by David Carter  |  savemoneysimple.com

  • The 50/30/20 Budget Rule: Does It Actually Work in 2026?

    The 50/30/20 Budget Rule: Does It Actually Work in 2026?

    notebook and money for budgeting with the 50/30/20 budget rule
    Photo by olia danilevich on Pexels

    You’ve probably heard this before: just split your paycheck into 50% needs, 30% wants, and 20% savings. Simple, right? On paper, sure. But if you’ve actually tried to make this work on a real American income with real rent prices, real grocery bills, and real student loans — you know it’s not quite that neat.

    So let’s talk honestly about the 50/30/20 budget rule — what it is, where it works, where it totally breaks down, and how to make it actually useful in 2026.

    What Is the 50/30/20 Rule, Exactly?

    The 50/30/20 rule was popularized by Senator Elizabeth Warren and her daughter in their book All Your Worth. The concept is dead simple: take your monthly after-tax income and divide it into three buckets.

    The Three Buckets:

    🏠 50% → Needs: Rent/mortgage, groceries, utilities, insurance, minimum debt payments, transportation

    🎬 30% → Wants: Dining out, streaming services, hobbies, travel, shopping

    💰 20% → Savings & Debt: Emergency fund, retirement (401k, IRA), extra debt payments, investments

    The whole appeal is that it replaces a complicated 20-category spreadsheet with just three numbers. You’re not tracking every coffee purchase — you’re just asking: am I roughly within these zones?

    And honestly, as a budgeting framework, that simplicity is its biggest strength. Most people abandon detailed budgets within weeks because they’re exhausting. This one you can actually remember.

    What It Looks Like in Real Life

    Let’s use a concrete example. Say your gross salary is $60,000 per year. After federal and state taxes, you’re probably taking home around $4,000–$4,200 per month (varies by state). Let’s say $4,000 to keep the math clean.

    Under the 50/30/20 rule, that gives you:

    Category Percentage Monthly Amount
    Needs 50% $2,000
    Wants 30% $1,200
    Savings & Debt 20% $800

    On paper: reasonable. In reality: $2,000 for needs might have you sweating if you’re renting in a mid-sized city. The national average rent for a one-bedroom apartment was around $1,500/month as of early 2026 — and that’s before utilities, groceries, car insurance, or a single student loan payment. You can see where this starts to fall apart.

    Here’s Where the 50/30/20 Rule Gets Honest

    I’ll give it to you straight: for many Americans, the 50% cap on needs isn’t realistic. According to Ramsey Solutions, the average American household’s take-home pay is roughly $5,645/month — yet average monthly spending on just housing, food, transportation, and healthcare comes to around $4,663. That’s over 80% of income going to basic needs before a single dollar hits a savings account.

    So no — for a lot of people, the rule doesn’t work as advertised. But that doesn’t mean you should throw it out.

    The bigger issue is that the 50/30/20 rule was built for a different cost environment. When housing ate 25–30% of income and groceries were predictably cheap, 50% for all needs was generous. In 2026, rent inflation, high grocery prices, and healthcare costs mean that “needs” routinely swallow 60–70% of income for average earners — especially in any city that isn’t a small Midwestern town.

    💡 The Real Problem: Most people’s “needs” include things that are actually wants in disguise — a large apartment when a smaller one would do, two cars when one might work, subscriptions lumped in as utilities. Before blaming the rule, do an honest audit of your needs bucket first.

    woman smiling while saving money in a jar, practicing the 50/30/20 budget rule
    Photo by Tima Miroshnichenko on Pexels

    Who the 50/30/20 Rule Works Best For

    Despite its flaws, there are real situations where the 50/30/20 rule is genuinely useful. Here’s who benefits most:

    People who are new to budgeting

    If you’ve never had a budget in your life, three categories beats zero categories every single time. You don’t need to be perfect — you just need a starting framework. The 50/30/20 rule gives you guardrails without feeling like a punishment. Start here, then adjust.

    Moderate-income earners in lower cost-of-living areas

    If you’re making $55,000–$80,000 and living somewhere with reasonable rent (think Midwest, parts of the South, smaller cities), the math can actually work. Your needs might genuinely land under 50%, which leaves real room for savings and some fun money.

    Higher earners who want a simple check-in system

    Interestingly, the rule works better as income goes up. Bureau of Labor Statistics data shows that households earning over $150,000 naturally allocate around 42% to needs and 30% to savings — which mirrors the 50/30/20 structure almost perfectly. The rule shines when needs don’t crowd out everything else.

    How to Adapt It When 50% Isn’t Enough

    Here’s the thing that nobody tells you: the percentages in the 50/30/20 rule are not sacred. They’re a starting point. If your needs genuinely require 60% of your income, you have options — and none of them require you to give up on budgeting altogether.

    Option 1: Adjust the split, not the principle

    A 60/20/20 or even 65/15/20 split might be more honest for your life right now. The key is to protect that 20% savings number — that’s the non-negotiable. You can compress wants before you ever touch savings.

    Option 2: Try the 80/20 rule first

    If you’re early in your career, carrying debt, or just trying to survive right now — simplify even further. Put 80% toward living your life (needs + wants combined) and automatically save 20%. Once that habit is locked in, add more structure. You’d be amazed how far one automatic transfer can take you.

    Option 3: Audit your “needs” category ruthlessly

    Before you assume your needs are uncontrollably high, dig into what’s actually in there. Streaming subscriptions, gym memberships you rarely use, the premium car when a basic one does the job — these are wants that sneak into the needs column. A subscription audit alone can free up $50–$100 a month for most people, which means more room in your real needs budget.

    Option 4: Attack the biggest costs first

    If housing is eating 40% of your income on its own, no budgeting framework fixes that without a lifestyle change — a roommate, a cheaper area, refinancing, or a pay raise. The 50/30/20 rule can’t override a housing market. But it can show you clearly where the biggest leak is, which is half the battle. Check out our guide on lowering your monthly bills for specific scripts to reduce fixed expenses.

    One Thing the 50/30/20 Rule Gets Right That Nobody Talks About

    Here’s my honest take: the most underrated feature of the 50/30/20 rule isn’t the math — it’s the permission structure.

    A lot of people who try to save money go too extreme. They cut everything, feel deprived, and blow the whole budget on one bad weekend. The 30% wants category exists specifically to prevent that. It’s the rule saying: you are allowed to spend on things you enjoy. Eat out. Buy the concert ticket. Take the weekend trip. Just keep it within 30%.

    From what I’ve seen, the people who actually stick to long-term budgets aren’t the ones who eliminate all spending — they’re the ones who give themselves intentional permission to spend in certain areas while being tight in others. That psychological balance matters more than the exact percentages.

    The 50/30/20 rule encodes that balance into a simple formula. And that’s worth something, even if the numbers need tweaking for your situation.

    Quick-Start: How to Apply It This Month

    Ready to actually try this? Here’s how to start without overthinking it:

    Step 1. Find your real monthly take-home pay (after taxes, health insurance, 401k deductions).

    Step 2. List every expense from the past 30 days and sort each one into: Needs, Wants, or Savings.

    Step 3. Calculate what percentage went to each bucket. Be honest — this number might surprise you.

    Step 4. If savings is below 20%, identify the first thing you’d cut from wants — not needs — to make up the gap.

    Step 5. Set up an automatic transfer on payday — even $50 or $100 — to savings before you can spend it. This one step does more than any spreadsheet.

    If you want a tool to make this easier, our roundup of the best budgeting apps for beginners covers free apps that categorize your spending automatically — so you’re not doing all this by hand.

    📊 Bottom line: If the 50/30/20 rule works perfectly for your income and city, great — use it. If it doesn’t, adjust the splits to fit reality while keeping the three-bucket structure. The framework is worth keeping. The exact percentages are negotiable.

    So… Does It Work in 2026?

    The honest answer: yes and no. For many average Americans facing high housing costs and inflation, the 50% needs cap is more of a wishful target than a realistic ceiling. If you’re one of them, the rule won’t magically fix that.

    But the three-bucket structure itself? That part works. It’s simple enough to remember, flexible enough to adjust, and psychologically designed to let you enjoy spending without guilt while still building savings.

    Think of the 50/30/20 rule less as a rule and more as a starting conversation with yourself about where your money actually goes. And in 2026, having any conversation about that is already ahead of most people.

    Written by David Carter  |  savemoneysimple.com

  • How to Save Money for a Car (Without Going Broke)

    How to Save Money for a Car (Without Going Broke)

    Happy couple celebrating their new car purchase at a dealership — how to save money for a car

    Photo by Vitaly Gariev on Pexels

    The average new car in 2026 costs nearly $50,000. Let that sink in for a second. Fifty. Thousand. Dollars. That’s not a car — that’s a down payment on a house in some states. If you’ve been wondering how to save money for a car without completely wrecking your budget, you’re not alone — and you’ve come to the right place.

    The good news? You don’t need to be rich, win the lottery, or sell a kidney. You just need a realistic plan — and maybe a little patience. Here’s exactly how to do it.

    Step 1: Know Your Real Number

    Before you save a single dollar, you need to know what you’re saving for. And that means getting honest about the full cost — not just the sticker price.

    Here’s what car ownership actually costs in 2026:

    • New car average price: ~$49,000–$50,000
    • Used car average price: ~$25,000–$26,000
    • Annual ownership costs (insurance, gas, maintenance): $400–$600/month on top of your car payment
    • Average yearly maintenance alone: about $838 per year (Kelley Blue Book, 2025)

    The car payment is only part of the story. A lot of people focus entirely on the monthly payment and then get blindsided when insurance, registration, gas, and oil changes eat up another $500+ a month. Plan for all of it.

    💡 The 20/4/10 Rule: Put at least 20% down, keep the loan to 4 years or less, and make sure all car-related costs (payment + insurance + gas) stay under 10% of your monthly take-home pay. It’s a simple sanity check that saves a lot of heartache later.

    So — new or used? From what I can see, a 3–5 year old used car is hands-down the smarter move for most people right now. You skip the worst depreciation hit (new cars lose 15–20% of value the moment you drive off the lot), and you still get a reliable, modern vehicle. Used cars average around $26,000 in 2026 — that’s nearly half the price of new. Hard to ignore.

    Step 2: Set a Savings Target (With a Deadline)

    “I want to save for a car someday” is not a plan. “I want to save $5,000 in 12 months for a down payment on a used car” is a plan.

    Here’s a simple way to think about it:

    Savings Goal Timeline Monthly Savings Needed
    $2,600 (10% down on a $26K used car) 12 months ~$217/month
    $5,000 (20% down on a $26K used car) 18 months ~$278/month
    $10,000 (20% down on a $50K new car) 24 months ~$417/month
    Pay cash for a solid used car (~$8,000–$12,000) 18–30 months ~$300–$450/month

    Pick a goal that stings a little but doesn’t break you. The sweet spot is a savings target you can hit without going on ramen-only mode for two years. Ambitious but livable.

    Step 3: Open a Dedicated Car Savings Account

    This sounds obvious, but it’s a game-changer. If your car fund is sitting in the same checking account as your grocery money and your Netflix subscription, it will get spent. Guaranteed.

    Open a separate high-yield savings account just for your car fund. A few solid options:

    • High-yield savings accounts (like those from SoFi, Ally, or Marcus) often earn 4–5% APY — way better than a traditional savings account paying 0.01%.
    • Money market accounts are another solid option if you want easy access and better rates.
    • CDs (certificates of deposit) can work if you have a longer timeline (12+ months) and you’re confident you won’t need to touch the money.

    Label the account “CAR FUND” so every time you log in, you see exactly what you’re building toward. It sounds cheesy, but it works — out of sight, out of mind, in the best possible way.

    ⚙️ Pro tip: Set up an automatic transfer the day after each paycheck hits. Pay yourself first, before you can “accidentally” spend it on takeout or a thing you saw on Instagram at 11pm.

    Person budgeting and counting money toward car savings goal

    Photo by Kaboompics on Pexels

    Step 4: Find the Money in Your Budget

    You don’t have to earn more to save more — though that helps. Often the money is already there; it’s just being eaten by things you barely notice.

    Start with a quick audit. Check your last 30 days of bank and credit card statements. Look for:

    • Subscriptions you forgot about — streaming services, apps, gym memberships you haven’t used since January. A quick audit like the one in our subscriptions waste money checklist can free up $50–$150/month easily.
    • Dining out — even cutting two restaurant meals a week to one can save $150–$200/month for many people.
    • Impulse purchases — that random thing you added to cart at midnight. Implement a 48-hour rule: wait two days before buying anything non-essential over $30.
    • Overpriced phone or cable bills — check our guide on how to cut your phone bill in half for some quick wins there.

    Even redirecting $200–$300 a month toward your car fund turns into $2,400–$3,600 in a year. Not nothing.

    What About Earning More?

    A short-term side hustle can dramatically cut your timeline. Selling stuff you don’t need is one of the fastest ways to get there — if you’ve got boxes of stuff sitting in a closet or garage, that’s money just waiting to become your car fund. Check out our guide on how to sell stuff you don’t need and actually make money to get started.

    Even one weekend declutter session could put $300–$600 in your car fund. And honestly, you’ll feel better without all that clutter anyway.

    Step 5: Make Your Credit Score Work for You

    Here’s something most people overlook when saving for a car: your credit score affects the total price you pay — significantly.

    In 2026, the average used car loan rate is around 12% APR, while new car loans average around 7% APR. But those rates vary hugely based on your credit. A buyer with excellent credit might get 5–6% on a used car loan. A buyer with poor credit might pay 18–25%. On a $20,000 loan over 5 years, that difference can cost you $5,000–$8,000 extra in interest. That’s the price of a car within the car loan.

    While you’re saving, also work on your credit:

    • Pay every bill on time — payment history is the biggest factor in your score
    • Keep credit card balances below 30% of your limit
    • Don’t open new credit accounts in the 6 months before you plan to finance
    • Check your free credit report at AnnualCreditReport.com and dispute any errors
    📊 Quick math: Boosting your credit score from “fair” to “good” before financing could save you $50–$100/month on your car payment. Over a 5-year loan, that’s $3,000–$6,000 back in your pocket. Worth the effort.

    Step 6: Use Windfalls Strategically

    Tax refund season is basically car fund season in disguise. The average American tax refund in recent years has been around $3,000. Instead of immediately buying a TV or booking a vacation, dump that straight into your car savings account.

    The same goes for:

    • Work bonuses — at least half of it
    • Birthday or holiday cash gifts
    • Overtime pay — if you pick up extra hours, earmark them for the car fund
    • Cashback rewards — if your credit card has cashback, redeem as statement credit and transfer the savings

    Windfalls are powerful because they don’t require you to change your daily habits — they’re “found money” that can fast-track your timeline by months.

    Step 7: Think About Timing — When You Buy Matters

    You can save thousands just by buying at the right time, even without negotiating harder or changing what you want to buy.

    Best times to buy a car:

    • End of the month — dealerships have monthly quotas, and salespeople get motivated as the clock ticks down
    • End of the year (October–December) — dealers are clearing out current-year models to make room for new inventory
    • Holidays like Memorial Day, Labor Day, and Black Friday — manufacturers often run special incentives during these periods
    • When a new model year drops — the previous model year’s vehicles get discounted fast

    Also: avoid buying in a rush. If your current car dies suddenly and you have to buy right now, you’ll make worse decisions. Keep your current car running as long as reasonably possible while you build your fund — that extra year or two of savings (and no car payment) can make a massive difference.

    Step 8: Track Your Progress (It’s More Fun Than You Think)

    Saving for a big goal is a lot easier when you can see yourself moving toward it. Here are a few low-effort ways to stay motivated:

    • Use a savings tracker app — apps like Mint, YNAB, or even a simple spreadsheet can show your progress in real time. Check our rundown of the best apps to save money in 2026 to find one that fits your style.
    • Draw a simple progress bar on a sticky note and put it somewhere you see daily — bathroom mirror, laptop, fridge. Old school but works.
    • Celebrate milestones — hit $1,000? Treat yourself to a nice meal (at home, budget version). Celebrate the win without blowing the fund.

    The psychological momentum from watching a number climb is genuinely motivating. You start to enjoy not spending because you can see what that discipline is building.

    You Don’t Need to Rush — You Need a Plan

    Saving for a car isn’t complicated — but it does require actually doing it instead of just thinking about it. Set your number, open a separate account, automate the transfers, plug the spending leaks, and let time do the heavy lifting.

    At $300/month, you’ll have $5,400 in 18 months. That’s a solid down payment on a reliable used car — one that’s yours from day one, not the bank’s.

    The car you want isn’t going anywhere. And with a real plan, neither is your money.

    Written by David Carter  |  savemoneysimple.com

  • Your First No-Spend Challenge: A Beginner’s Starter Guide

    Your First No-Spend Challenge: A Beginner’s Starter Guide

    colorful sticky notes flat lay for planning a no-spend challenge

    Photo by MART PRODUCTION on Pexels

    Roughly 51% of Americans are currently living paycheck to paycheck — which means that for a lot of us, there’s just not a whole lot of breathing room left over at the end of the month. If you’ve been meaning to save more but can’t figure out where the money keeps disappearing to, a no-spend challenge might be the fastest, simplest reset you’ve never tried.

    This guide is for complete beginners. No spreadsheets required, no financial degree needed — just a clear plan and a little bit of willpower.

    What Is a No-Spend Challenge, Exactly?

    A no-spend challenge is exactly what it sounds like: you pick a period of time — anywhere from 3 days to a full month — and commit to spending money only on true necessities. Rent, utilities, groceries, gas. Everything else? Off the table.

    No takeout. No Amazon impulse buys. No random Target runs where you walk in for shampoo and walk out $80 lighter. Just the essentials, nothing more.

    The goal isn’t to suffer. The goal is to hit pause, see what you actually need versus what you’ve been mindlessly buying, and pocket the difference. From what I’ve seen, even a single no-spend week can shake loose some genuinely eye-opening habits — like realizing you’ve been spending $40 a week on coffee without giving it a second thought.

    Step 1: Get Clear on Your “Why”

    Before you do anything practical, you need to know why you’re doing this. Not in a journaling-exercise way — in a real, practical way.

    Are you trying to build an emergency fund? Pay off a credit card? Save up for a trip? Just figure out where your money is going?

    Write it down. Put it somewhere you’ll see it. When Day 4 of your challenge rolls around and your DoorDash app is calling your name, you need a reason that’s more compelling than “I guess I should save money.”

    💡 Quick tip: Write your “why” on a sticky note and put it on your credit card. Physical reminders work surprisingly well when the temptation hits.

    Step 2: Pick Your Timeframe (Start Smaller Than You Think)

    Here’s a mistake beginners make all the time: they announce a 30-day no-spend month on a Monday and give up by Thursday. The scarcity mindset kicks in hard when you go full throttle from day one.

    Instead, try this progression:

    Timeframe Best for… Estimated savings*
    3–5 days Complete beginners, testing the waters $50–$100
    7 days First-timers who want a real challenge $100–$250
    30 days Those who’ve done a week and want more $300–$800+

    *Estimates based on typical discretionary spending; your results will vary.

    Start with 7 days if you can. It’s long enough to break a habit but short enough that it doesn’t feel like a prison sentence. If 7 days goes well, you can stack another week right after — or plan a full month for next time.

    Step 3: Set Your Rules (And Write Them Down)

    This is the most important step. Vague rules = vague results. Before your challenge starts, write down a clear list of what counts as “allowed” and what doesn’t.

    Always allowed (non-negotiables):

    • Rent/mortgage
    • Utilities (electricity, water, internet)
    • Gas or public transportation
    • Groceries for meals at home
    • Necessary medications

    Typically banned during the challenge:

    • Restaurants, takeout, and coffee shops
    • Clothes, shoes, accessories
    • Entertainment (streaming upgrades, movie tickets, apps)
    • Online shopping of any kind
    • Impulse purchases at the grocery store
    💡 Beginner’s trick: Keep a “want list.” Every time you’re tempted to buy something, write it down instead of buying it. After the challenge, look at the list — you’ll be surprised how many things you no longer want at all.

    Your rules should fit your life. Someone who drives 45 minutes to work needs gas money. A stay-at-home parent might need more grocery flexibility. Customize it — just be honest with yourself about what’s a need versus what’s a habit dressed up as a need.

    woman relaxing at home reading a book enjoying free activities during a no-spend challenge

    Photo by Anna Tarazevich on Pexels

    Step 4: Prep Before You Start

    A no-spend challenge isn’t something you just wake up and start cold. A little prep goes a long way:

    Stock your kitchen. Do a grocery run before the challenge begins. Meal plan the whole week so you’re never staring at an empty fridge at 7pm and convincing yourself that pizza delivery is a “necessity.”

    Do a pantry audit. You probably have more food than you think buried in the back of your pantry. Rice, canned beans, frozen stuff from three months ago — challenge yourself to actually use what you’ve got.

    Unsubscribe from marketing emails. Out of sight, out of mind. If you’re not seeing “FLASH SALE: 40% OFF TODAY ONLY,” you won’t be tempted. Take 10 minutes before your challenge starts to unsubscribe from every retailer email in your inbox.

    Delete shopping apps. Amazon, Target, Shein — gone for the week. Just hide them at minimum. Making it slightly inconvenient to shop is shockingly effective.

    Plan free activities. Boredom is the enemy of a no-spend challenge. Line up some free things to do: parks, libraries, home movie nights, cooking new recipes, calling a friend. If your social life depends on spending money, this is the week to get creative. Check out our list of free activities to do when you’re broke for ideas that are actually fun.

    Step 5: Track Everything — Even the Slip-Ups

    Every day of your challenge, write down what you spent (or didn’t spend). A simple note on your phone works fine. The act of tracking does two things: it keeps you accountable in the moment, and it gives you something satisfying to look back on.

    And if you slip up? Don’t quit. Seriously — this is where most people go wrong. They buy a coffee on Day 3 and decide the challenge is ruined. It’s not. Reset, continue, and keep going. One unplanned $5 purchase doesn’t erase the $200 you didn’t spend on everything else.

    💡 Reframe the slip: Instead of “I failed,” try “I almost spent $80 on clothes, bought a $5 coffee instead, and saved $75.” That’s still a win.

    What to Do With the Money You Save

    This part matters more than people realize. If you complete your challenge and the saved money just… sits in your checking account and gets spent on something random two weeks later, you’ve lost the whole point.

    The moment your challenge ends, move the money with intention. Some options:

    • Transfer it to a separate savings account immediately
    • Make an extra payment on a debt
    • Put it toward a specific goal (vacation fund, emergency fund, etc.)

    If you want to build real momentum, pair this habit with a simple budgeting system. Our guide on the best ways to lower your monthly bills can help you keep the savings going even after the challenge is over.

    One More Thing: Make It a Habit, Not a One-Time Event

    Some people do one no-spend week a month. Others do two or three no-spend days per week spread across the month. Both approaches work — the key is making it a repeatable habit rather than a crisis-response-only move.

    The best part? The more you do it, the easier it gets. The first time is the hardest because your brain keeps reaching for old habits. The second time, you already know that you survived — and that confidence makes a big difference.

    You don’t have to be extreme about it. Nobody’s asking you to give up Netflix forever or grow your own vegetables. You’re just hitting pause on the autopilot spending for a few days — and seeing what your life looks like when you’re actually in control of where the money goes.

    Written by David Carter  |  savemoneysimple.com